Moving Assets into Blender
Introduction
We will use the file created in the “Illustrating the Export Process for Subsequent Import” section. The MakeHuman export settings used when targeting Blender import should include setting the scale units to meters. Blender is capable of importing either Collada (.dae) format or Autodesk FBX format files. The import results and handling are quite similar regardless of which you choose to use, and both will require similar fixes for transparent assets on the eyes, eyebrows, eyelashes, and hair. Collada files are text based, and thus, are often quite large. Makehuman assets with textures will be exported with those textures saved in a folder named "textures" in the same folder as the parent folder. By default, on Windows If you move the collada file to a new computer or directory, you must move the "textures" folder to that same folder. By default the exported file will be found in ~/makehuman/v1/exports/ (where ~ is the user home directory).
Blender can import only binary FBX files at present, so ideally, binary would be checked for MakeHuman FBX export. [RWB Note: As of this writing there are still some issues with direct FBX binary export, but those are expected to be repaired going forward. In the meantime, a viable workaround for those wanting to use FBX format is to export an ASCII FBX file, convert it with the Autodesk FBX converter, and import it into Blender].
Because of the ASCII --> binary issues that currently exist with the FBX format, we will describe moving assets from MakeHuman to Blender using collada (.dae) format. When exporting for subsequent import into blender, the best choice of export scales is usually meters.
Importing a MakeHuman Collada File
The collada file is imported into Blender using the File | Import menu and choosing collada. The default settings at the bottomof the left, T-tool panel will generally not need to be altered.
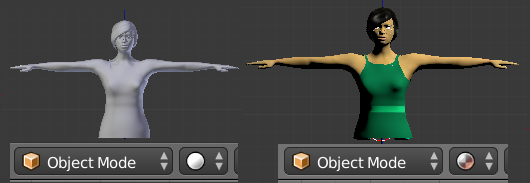
Once imported the file is likely to appear gray in the 3D viewport when in object mode and shading set to solid (Figure 1, left panel). If shading is set to rendered with blender internal (BI) selected in the render drop down menu, the image will show the materials for many assets, but the eyes, eyebrows, eyelashes, and hair which contain transparent texture maps will not render properly.

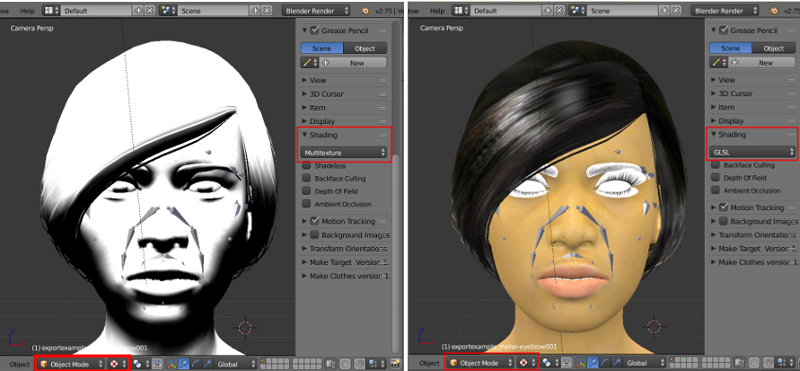
More often if we wish to select objects in the scene we will set the shading mode to 'texture' instead of 'render'. By default the model will appear gray/white in texture mode by default. To improve this, bring up the N-tool panel by typing N with the cursor located over the 3D viewport or by selecting View | Properties from the 3D menu. On the toolbar, locate the shading panel and click on 'Multitexture' to change the setting to 'GLSL'. The image should now show non-transparent materials properly (Figure 2).

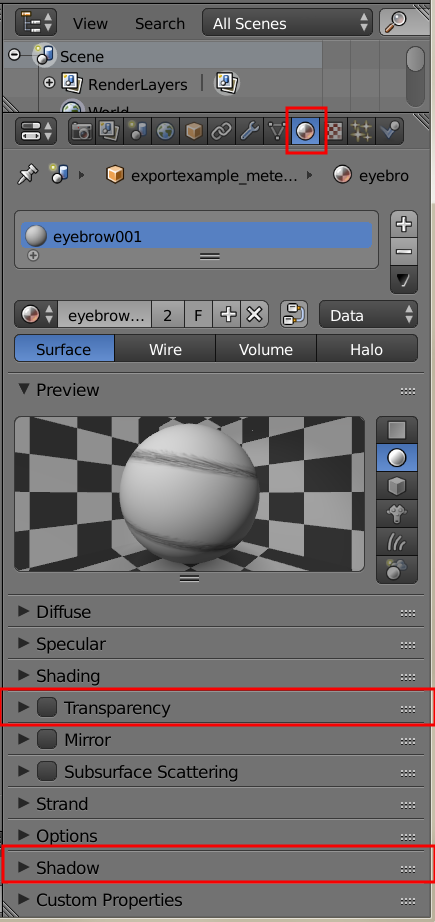
In some cases, you might gain additional benefit in displaying materials for the eyes by going to the Object data tab (cube). This is located on the far right properties panel. For each of the transparent assets (eyes, eyelashes, eyebrows, and hair) select the Display panel and check 'Draw all Edges' and 'Transparency' in the bottom row. The benefit of this step for improving trasparent assets will depend on exactly how you imported the file, the lighting, and possibly other settings. What you see in the viewport is close to what yo will see if you choose Render | OpenGL Render from the Info editor at the top of the screen.
Preparing for Render with Blender Internal Renderer